7.30.2010

This weekend, I am:

1. Swapping our guest room and master bedroom.
2. Celebrating Mom's 50th birthday with a big bar bash.
3. Making my famous scones.

Last night while browsing through my inspiration binder, I got a wild hair.  To my friends and family it is no secret that I rearrange and redecorate regularly, so this should come as no surprise to them.  I need change, so we are moving out of our master bedroom and into our (smaller) guest room.  I have many valid reasons for doing this, as always, but mainly because the feng shui^ is much better in the guest room.  Ever since little sister and I painted the room a couple weeks ago when she visited, I have found myself spending more time in that room and really enjoy how it has come together.

There are a couple of obstacles to overcome with this move, though.  One, the closet is significantly smaller than the closet I currently have in the master bedroom.  That's right, I have.  Gabe's closet is in his studio in the adjacent room.  Totally necessary.  So, I will need to either downsize the wardrobe or store my out of season clothing in the other closet.  I may do a combination of both, because I love to get rid of things!  Another concern is placement of Ziggy's bed.  Bowie sleeps with us--all 70+ lbs of husky/shepherd on a queen size bed--but Ziggy has her own big bed on the floor, which will be tricky to place in the smaller room.  I don't doubt I can make it work, it's what I do, but it may take some trial-and-error.

When redecorating, I sometimes draw out the rooms and space plan that way, but more often I simply dive in and start pushing and pulling, flipping and lifting stuff.  The hands-on approach has produced the best results in my experience, even though the drawings always look promising. 

Since I got hubby's thumbs-up last night, and we survived our trial night of sleeping in the guest room, I plan on bursting through the door at 5 o'clock this afternoon when I get off work, blasting Feist, and commencing relocation.

Here is the BEFORE:


Gimme a week or so to produce a decent AFTER, won't you.  :)

In other news, Mom is turning the big 5-0 tomorrow, and at her request, we are having a big karaoke party for her tomorrow at a local bar.  As I've told you before, Mom is country.  A true-blue redneck woman.  Now, I can't divulge the details of this party, in case she is reading this post right now, so I'll have to be careful.  But I will give you a hint: you know who else is turning 50 this year?  No?  I'll tell you.  Little Debbie!  As in Little Debbie snack foods.  AND...wait for it...Mom's name is Debbie!  How perfect is that for a theme??  I sent out announcements a couple weeks ago, and have received a great response, so this party is turning out to be a great one!

Lastly, my homemade scones.  I have recently become absolutely obsessed with TasteSpotting, 'a community driven visual potluck,' as the site proclaims.  I stumbled upon it on Monday, and have been ogling ever since.  Several recipes have inspired me to make some really killer meals this week, like the BBQ mussels with white wine butter sauce, cold Dijon veggies salad, roasted creamer potatoes, and asiago pepper loaf I prepared for dinner on Monday, with them help of hubby and BILly (brother-in-law) Theodor.  I have not yet made savory scones, only sweet, so I plan on mixing it up on Sunday.  I have got the basic technique down for preparing my scones, all I have to do is swap out the berries and lavender with, I dunno, peas and bacon?  Or perhaps I will use roasted corn and...bacon?  Or bacon and bacon?  Mmmmm.  Bacon is the one thing I missed while I was a pescetarian the past year and a half...  Now we have been reunited and I am again fully satisfied.  Man this is a long post.

What are your weekend plans?  Anyone else driven by feng shui when decorating?  ^If so, a great reference is the book Practical Feng Shui, by Simon G. Brown.  Hubby bought it for me several years ago, and I depend on it every time I choose to spruce up a room.  My favorite section in the book is where he diagrams each position of the bed, facing every possible direction, and what each placement means.  We find that having our bed positioned so our heads are facing east when lying down is most favorable for us in our current stages of our lives.  In short, this position makes young professionals feel like the world is their oyster, so to speak.  Check it out.  And have a happy weekend!

7.28.2010

WEDding WEDnesdays: for the kiddies in the wedding party

Wedding junk is expensive.  You with me? 

I could not bring myself to buy a fancy basket for the flower-girl or a fancy pillow for the ring-bearer to carry down the aisle.  So, being the crafty girl that I am, I made my own.  Luckily, I already had an old Easter basket that would work splendidly for the flower-girl to carry if I dolled it up a bit. As for the ring-bearer's pillow, I enlisted the help of my MOH, the talented Vicki, to help me make it from scratch. 


She sewed the pillow from a roll of muslin I had leftover from a college project (years ago!), using a cool zigzag stitch in dark blue thread.  Me?  I drank wine while plotting the pillow's ornamentation.  Yes, this is the same muslin I used to line the inside of my vintage train case that housed the guests' comment cards at the reception {mentioned here}.


My dining room was our sweatshop;  and although it looks insane, we were actually done with the project in only a couple of hours.  Put two Virgos on a project together in a time crunch, and you will see magic my friends.

Because I had read that it is a very bad idea to give a small child the responsibility of carrying your actual wedding bands at the ceremony, I faked it with two shiny key rings to decorate the pillow.  And because I have the corniest humor known to my circle of family and friends, I used buttons and one of Gabe's guitar picks to spell out the phrase, 'I Pick You.'


For the flower-girl's basket, I used the leftover muslin to line the inside of the basket, making it easier for her to grab the flower petals to sprinkle down the aisle at the ceremony.  I glued a strand of vintage ribbon around the outside of the basket, and wrapped a couple strands of pink beaded ribbon around the handle.  All of this material was supplies I already had on hand from previous craft projects, including the two faux dahlias I pinned to the base of the handle on each side of the basket, which were leftover from the bridesmaids' shoes project {mentioned here}. 

I used the same ribbon and dahlias, along with some vintage buttons and my old cheerleading hair ribbons, to make the flower-girl's headband as well.  Originally, my plan was for me to wear the headband, but after I finished it, I realized it would be much more fitting for the under-ten-aesthetic.  I gifted the headband to Taylor at our rehearsal dinner, and told her it was her's to keep after she wore it in the wedding.  I don't know who was more excited, her or me, judging by her reaction.


We gave Dino, our ring-bearer, a vintage bow-tie for his gift at our rehearsal dinner, so he would look just like the groomsmen in their vintage bow-ties.  But, that's another post.  :)


As you are probably noticing by now, if you have been reading the WEDding WEDnesday posts from the start, we did not go the traditional two-color-scheme route for our wedding.  Instead, we mixed patterns, styles, and colors, but for the most part kept within a certain color palette.  That palette was inspired by this photo:


When I stumbled upon this beauty, there was no questioning what our 'colors' would be for our wedding.  We originally had planned on sticking to 'dark chocolate and raspberry' but eventually realized the visual was lacking.  I never wanted our color choices to be so obvious that they screamed theme, so we were satisfied with the palette we chose.  It also gave us focus in a world of chaos infinite choices, known as wedding planning.

More next week.  Happy hump day! 

7.25.2010

Success! Behold the flognarde

As promised, since my fancy recipe was a total success, I am sharing it with you.  Yesterday, I made a Peach and Blackberry Flognarde, following Chef John's instructions.  Chef John is the creator of Food Wishes, a food blog where he hilariously shares his culinary talents with the world.  He has a kind of dry sense of humor, which I love, and also which I find to be a refreshing break from the stale (get it, stale? punny, right!) food bloggers who don't inject humor into their recipe-sharing.  Food is supposed to be fun!  His style is relaxed, straight-forward, and funny, and his recipes are easy to follow on his videos.  He even taught me how to crack and egg with one hand!  Honestly, knowing how to do this was on my bucket list, so I watched his how-to video, tried it, and nailed it the first time.  I was so freakin happy, you don't even know. 


Anyway, the recipe, pronounced 'flow-nyard', is quite simple.  Click the link above for his recommendation on how to make it.  I made a few minor adjustments to mine {no surprise there}, so it looks a little different.


First, I used my freshly picked blackberries, which I had been storing in a Ziploc bag in the freezer.  When I thawed them out to use them in the recipe, there was a considerable amount of juice that ultimately ended up in the dish, hence the darker color.  Second, I used all-purpose flour rather than whole wheat.  And lastly, I used a hell of a lot more peaches.  The aroma filled my kitchen, and I could not wait to indulge once it had finished baking and cooled completely. 

The result is much like cobbler, but instead of a crust, there is an almost pudding-like consistency to the baked batter.  And the thyme, yes thyme, is an interesting and very welcome flavor.  If you have thyme time, check out Chef John's blog, and maybe even try this recipe yourself.  I'm having it for breakfast with coffee. Right. Now.

7.24.2010

That's a recipe for delicious: Pear and Brie Croissant

The wheels have been turning, continuously, planning how I am going to use up all this fruit.  I'm hesitant to just grab and eat the peaches and pears, in case inspiration strikes and I need x amount for a culinary creation.  Though, that hasn't necessarily stopped me.  These peaches are by far the juiciest I have ever eaten.  I am hoping to score a dozen or so more tomorrow when I will again find myself in the Delta for the annual Pear Fair.  I know, I've mentioned the event before, so to follow through, I will post photos of the festivities next week.

Back to eating. Yesterday I threw together this little sandwich, and I have to admit, it was pretty. damn. good.


I had some freshly baked croissants from the market, Virgin Organic wildflower honey (my current fav!), d'Affinois double-creme brie cheese, fresh Bartlett pears, and ground black pepper--a winning combination.  Since we don't have a panini press, which is totally fine by me although Gabe would love to own the bulky gadget, I instead used our small handy George Foreman grill.  If you're reading this, there is a 90% chance that you too own one, whether as a result of an impulse buy, or receiving one as a hand-me-down when you moved into your first place, like us. ;)  It works beautifully for making panini-style sandwiches, and especially on croissants...all that butter...yum.

If you feel like trying this recipe out, feel free to sub any of these ingredients with your personal faves or with goods you have on hand.

1 croissant, sliced lengthwise in half
2 T brie cheese, or enough to create a thick layer on one side of the sliced croissant, close to room temp
wildflower honey, drizzle desired amount over cheese on croissant
freshly ground black pepper, only a little
1/4 medium Bartlett pear, firm and thinly sliced, arranged over other ingredients on croissant

Top with other half of the croissant, pressing softly to adhere.  Place on preheated grill plate and close lid.  Let 'grill' for only one minute.  Plate and let cool slightly before enjoying.

Now that I am typing this, I realize a beer would have paired perfectly with this sandwich.  I bet a Pyramid Apricot Ale would have been golden.  Oh well, next time.     

I'm still up to my ears in fruit and berries from Wednesday's pickings, so I will probably be sharing recipes periodically with you until the lot's run out, which will be a sad day.  I just found a 'fancy' recipe I'm very intrigued to try that calls for my peaches and blackberries, so wish me luck.  If it is a success, I will share.  Promise.

7.22.2010

Sweet Summertime

We finally caught a break in the capital city yesterday with a nice cool breeze and only double-digit temperatures.  Of course I took advantage of this break, knowing it likely would not last.

After work, I went home and changed into comfy play clothes {hubby's tattered vintage shirt}, grabbed some gear, and drove down to the Delta for some good ol' fashioned fruit pickin'.  I parked at my friends' home and helped myself to two dozen beautiful peaches off their tree, at their insistence.  No one was there at the house yet, except for their two farm dogs--one of which was finishing off a dead bird.  Not so pleasant.  But soon, my friends Clayton and his lady Manuela showed up and invited me inside for a glass of wine.  I love being in wine country.

Clay poured me the last of the Bogle Chardonnay in the bottle, which I have had countless times in the past, but it seemed to taste different this time.  I buried my nose in the stemmed glass, breathing in every note. Vanilla. I stopped there.  The next smell wasn't a fruit or a spice.  All I could smell were the vines, the barrels, the fermentation, and the juice combined.  I was overwhelmed as the entire wine-making process flashed through my memory, and I hadn't even taken a sip yet.  I have so much appreciation and respect for this industry, that I can't help but get emotional.

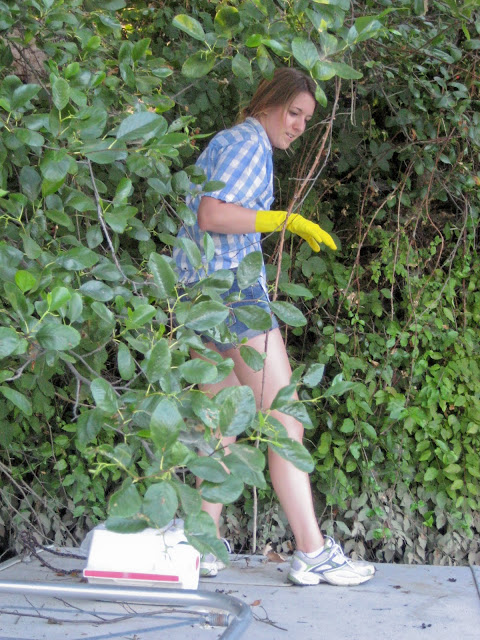
It took me a good twenty-five minutes to finish my glass, sip by sip, and by that time, Abby had arrived to join me for picking.  With our play clothes and rubber gloves on, bags and camera in hand, we headed out to the slough dock to try our luck.  We also brought a wooden skim board to use as a 'plank' on the vines, should we need to explore beyond the surface.


I decided to jump right in, while Abby quickly volunteered to play photog after seeing too many spiders in the vines.  The gloves were a must, not only for protection from the thorns on the vines, but also to keep us from looking like we murdered someone with our bare hands. {Blackberries stain your skin something terrible}.  

We wiped out the areas we could reach from the dock and the floating barge, so we decided to take a stroll down the slough road to see if we could spot a jackpot. 


No luck, but the views and the company were marvelous.


Abby knew of a spot near her house, about two miles away, that would surely please us.  She also lent me a shirt when the Delta breeze cooled the temp down in to the 60s. 


This time she jumped in to the action, and together we filled my little 80s cooler, all before sundown. We even had time to pick some famous Bartlett pears.  The best.


Exhausted, but delighted, we gathered our booty and headed home. 


All this delicious fruit.  Too many recipes to choose from.  Any recommendations? 

The last picture is deceiving, admittedly, as there are only about half as many peaches left...mmm...

7.21.2010

WEDding WEDnesdays: low-tech, high-impact

When it came down to it, a photo booth was not in our budget, although we had always planned on having one at our reception, even before they were popular.  Our Plan B turned out to be a much bigger hit, and I am so happy we didn't skimp so we could ultimately afford to rent an actual photo booth.  What did we do?
We took down the Suzani-print drapes in our living room, gathered some twine and a vintage wooden picture frame, and we made our own photo booth at the ceremony site.


Guests were encouraged to take their own pictures while waiting for the ceremony to begin in the 'booth.'  These shots were from our photographer, Scott.  Gabriel and his groomsmen set it up before guests arrived in a very short amount of time, and the best part is there was no waste or expense.  The drapes and frame are now hanging in his music recording studio in our house (but that's another post). 

In the reception room, hanging on every wall behind guests' seats, were streamers of photos of me & Gabriel throughout the years.  Mixed in were childhood photos of each one of us, family photos, and the two of us during the past [now ten!] years.  He and I made a few of the streamers at our house, using ribbon and clothespins we already had on hand, but my mom and mamaw made all the others.  It was a lot of fun in the months leading up to the big day to have our friends' parents and our families contribute photos they had of us too.


This element has to be one of my favorites of all our decorations.  It was so touching to hear and see people mingling with others while reminiscing and commenting on all the photos.  It got people out of their chairs before and during the reception, and provided an easy ice breaker for guests who didn't know each other--not that it was necessary in our friendly outgoing crowd.  And, just as with the 'photo booth,' there was no waste associated with this project; all the materials and photos are either being re-used or stored for future use. 

I had heard horror stories about computer slide show malfunctions, so we chose to go the low-tech route with the photo streamers.  I'm so glad we did.  Not only did we save stress and $$ by nixing the slide show and all the technical equipment associated with it, but looking through the photos our photographer shot, I love seeing these streamers in the background behind the happy guests.  I think they helped set the tone and added to the homey mood in the room.

Never underestimate the power of personal touches, my friends.  

Perhaps that last line should have been the theme for 'WEDding WEDnesdays.'

{Suzani drapes were purchased at Cost Plus World Market.}

7.20.2010

Look what goodness I just discovered!

Abby and I have been discussing our ensembles for this coming weekend's festivities--the annual Pear Fair in the Delta {woo! woo!}--all day.  I believe I've worn a dress every year for the past twelve, but I feel like mixing it up this year.  Plus, I learned from last year's miserable experience (+100°) to stick with 100% cotton. 
While browsing the usual: Anthropologie, J. Crew, I thought to check out H&M to see if I could find cheaper duds, since there's one across the street from anthro.  And oh man am I glad I did.  Look what they have on their website:

It's like virtual paper dolls for grown-ups!

I just threw together this look in a few minutes, but there are many more models and clothing options for you to choose.  So. Freakin. Fun.  They call it their 'Fashion Studio' and you can even dress male models!  I think the program is very well done--which says a lot, given my Virgo-high-standards.  Run your mouse over and click any item of clothing you place on your model, and it will give you the option to tuck in a top to the bottoms, belt a tunic, layer, or remove an item from the outfit.  The prices of each item are clearly marked, and all the items are currently sold in the store, so you can take your little model fashionista into your local store and play dress-up yourself.  Suddenly, I'm a girly girl. Thanks, H&M. 

I would love to see your looks you come up with, so please e-mail them to me.  Stay cool.

Okay, one more...


Last one, I promise...


I lied...


7.16.2010

This weekend is...

...this guy's birthday!  

 my guys: Clayton, (me), Casey

My long-time buddy Casey is turning 25, which means a blow-out all-weekend party in the Delta. Keg. Boats. Bocce ball. Beer. BBQ. Tent Camping. Wine. Beer. Beer. Big brother Clay makes the most delicious Chardonnay, so I'm hoping he still has some on hand.

Me & Abby showing off our guns in a heated game of bocce

...and more than likely many rounds of beirut, flip-cup, and other beverage-related festivities.

Nancy, Clay & Case's mom, loves her beer. And we love mom. ;)

What plans have you for this weekend, friends?  Hopefully they involve spending time with friends and staying well-hydrated. ;) Yay for summertime!

7.15.2010

original quoment (II)

Was I just a drag from a cigarette when you were feeling uninhibited?

7.14.2010

WEDding WEDnesday - paper goods: eco-friendly and cohesive

There are a handful of wedding items that have become basic or expected items, that I agree are necessary and practical.  I.e.: the Save the Dates, Invitations, RSVP cards, all for obvious reasons: to get the word out!  Brides must remember not everyone has a computer, so you cannot expect everyone to go on your website and click "RSVP" just to save paper/money...

There are inexpensive ways to produce these items yourself, like I did.  First: skip the fridge photo magnets.  They're pricey, not everyone has a magnetic fridge facing, and even if it is magnetic, many folks are anti-magnets. I'm just sayin'... I get that it's a cute idea, and I'm not putting down those who send them out, this is strictly a DIY post to inspire alternative methods.

Below are bitmap versions of these items I created, either in Microsoft Word or Excel--super simple stuff, friends.  They were as easy as fitting into the 4- or 8-card postcard templates, printing, and detaching at the perforated lines stamped on each sheet of paper, with an additional design element thrown in here and there... [refer to previous posts for paper type]  


For the Save the Dates, we made them on 4-card postcards, printed front and back, with the photo of us in 'washout' so as to use less ink.  One postcard was sent per household, with our return address printed on the reverse side (censored for blog), and a heart where the postcard stamp would go.  Bonus! Postcard stamps are significantly cheaper than normal postage.  We printed out mailing label-stickers for the recipients on Avery 30-label sheets in Word, which also acted as a general database for storing everyone's addresses for wedding related mailings and future needs.


For our invitations, we used the unbleached recycled 4-card postcard paper, and again, printed on front and back. The front informed guests of the basics, and the back had a simple map and specified that the ceremony and reception would take place at the same location.  I used a silver metallic marker to draw a cute heart at the top of each invitation above the "Boy met Girl" line.  

Honesty is the best policy, so be honest and remind yourself that rarely do guests save the invitations, or any paper good from weddings for that matter, so it doesn't make any sense to spend money on calligraphy/glossy hi-res color photos/embellished invitations that will likely be in the waste bin the day after your big day.


We printed the RSVPs with each guest's name typed on the lines under "Invited Guests," and the response options made it easy for people to give us a simple answer.  Many people even wrote us fun notes on the remaining lines, which made receiving each one that much more fun!  On the reverse side, the card looked very similar to the Save the Dates postcard mailings, and of course we stamped each card with a postcard stamp.  These were packaged along with the invitations in a postcard-size envelope, and the cost per packet was less than a dollar, including postage! 


The table markers were printed out on 4-card postcard paper, using yippy skippy font--same as our comment cards--and trimmed with a Martha Stewart paper edge cutter.  We then glued each number to the inside cover of vintage books, a collection we picked up from Goodwill for a buck a piece.  


The book covers matched our color palette, and we used the pages of the books to make petal cones for the ceremony!  Each aisle chair had a cone full of petals (donated by our BM's mom from her abundant rose garden), attached with a straw ribbon loop.  This project was practically free, and is one of my favorite, since we were able to be so resourceful to pull it off.  They also contributed to my favorite photo from the ceremony:

 not sure who wore that lipstick better, me or him...


Using the 8-card postcard paper, I printed out the notices we received from our honeymoon registry when people purchased gifts for us, which I showcased on our gift table 'honeymoon board' at the reception.  By the way, the little orange man thumbtacks were a wedding gift from my MOH from CB2.  Love!


Lastly, I know I wrote about the favor labels in a previous post, but I wanted to show you the trick I used on the 8-card postcard paper.  I carefully measured and placed two asterisks on both sides of the labels, so that anyone helping me attach each one to the jam jars would know where to punch the holes for the hemp twine.  It's the little details that, if overlooked, can cause frustration.  Anyway, even with all that careful planning, things out of your control can screw with you, like my printer frizzing out on the second-to-last label each time...

Doing what you can on your own, such as projects similar to these that I am sharing with you, not only cuts down on costs, but waste and stress as well.  Oh the stress and pressure of putting these projects in someone else's hands, even if they are professionals! 
...But that mainly speaks to the control-freak Virgos. ;)

.More to come next week.

...all professional photos taken by Scott Fischbein of Fischbein Photography....

7.12.2010

I'm not usually heavy...

...as in subject matter.  However, after reading this, I cannot help but express the flood of emotion I am feeling at the moment.  A fellow blogger, Marija, was killed in a car accident this past weekend while driving home from an out-of-state antiquing trip. Her husband has posted a very touching story, which took a lot of courage and care to do for his wife and her community.  I'm not going to curse bad drivers on the road, or question the purpose of this tragedy, but rather commend the community we all belong to.  If you are reading my blog right now, you are part of my community, either through personal friendships, family, or what I like to call the Design-blog World.  It is so moving to read about random strangers expressing sorrow, joy, luck, success, understanding...on a daily basis.

I did not know Marija, nor did I know her family, but as I read the comments people are leaving on her blog, bulletins people are posting on facebook, or personal stories on other bloggers' websites, I know that Marija was a friendly person who inspired people.  She was part of a community much greater in size than that of her neighborhood.  She has fans, friends, clients, admirers, people whose lives she personally touched. Reading her husband's words, for a moment, we in this community took a break from living in a fantasy land, where city-dwellers picture throwing a fancy garden party in their beautifully landscaped yard they don't realistically have, or southern-hemisphere residents daydreaming about sun-soaked beaches to escape their bleak winter weather, and we were hit with a big bag of real.

I always worry about what to say to someone who has just experienced a serious loss.  I feel like everything I could possibly say to express my feelings sounds so lame.  How many ways can one say 'sorry?'  But, you know, it doesn't matter.  The support is what counts, not conjuring the perfect sentence.  Word of this tragedy has been spreading like wild fire and will likely continue to do so.  The biggest impact will be the overwhelming sense of support and community from total strangers, world-wide.  I am so lucky to be a part of that community.

7.03.2010

Related Posts with Thumbnails